Every year, contractors all over are looking to improve their concrete building practices. For many this past year, that has likely meant fine-tuning their logistics to adapt to the global shipping crisis. However, that crisis is still ongoing, which means contractors will face more delays while attempting to complete their construction projects on time.
Delays can waste a lot of valuable time. So to counter that loss, contractors should consider what they can do to become even more efficient.
One way to boost efficiency is to simply consider how you evaluate your concrete’s compressive strength development. Are you solely relying on break tests? If so, you’re missing out on a faster, simpler, and more accurate method: the maturity method.
To see why that is, we’ve once again brought on Maturix’s instructional designer, Marina Salvador, to explain why.
(Want to see her definition for the maturity method first? Take a look at her post here.)
Is Either Concrete Strength Assessment That Crucial to Worksite Efficiency?’
In a word, yes. For construction projects, knowing concrete strength is crucial as many future decisions depend on it. Decisions such as determining when to remove forms, schedule post-tensioning operations, open bridges and roads to traffic, and remove heating measures against cold weather all depend on having the right concrete strength.
Break tests and the maturity method are two approaches on how to determine that strength.
What about Break Tests? How Exactly Do They Work?
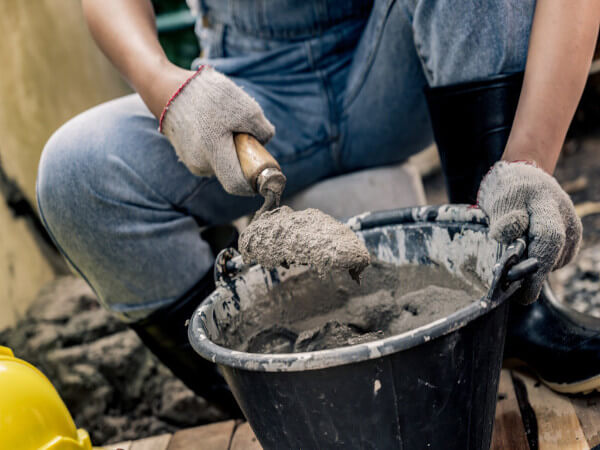
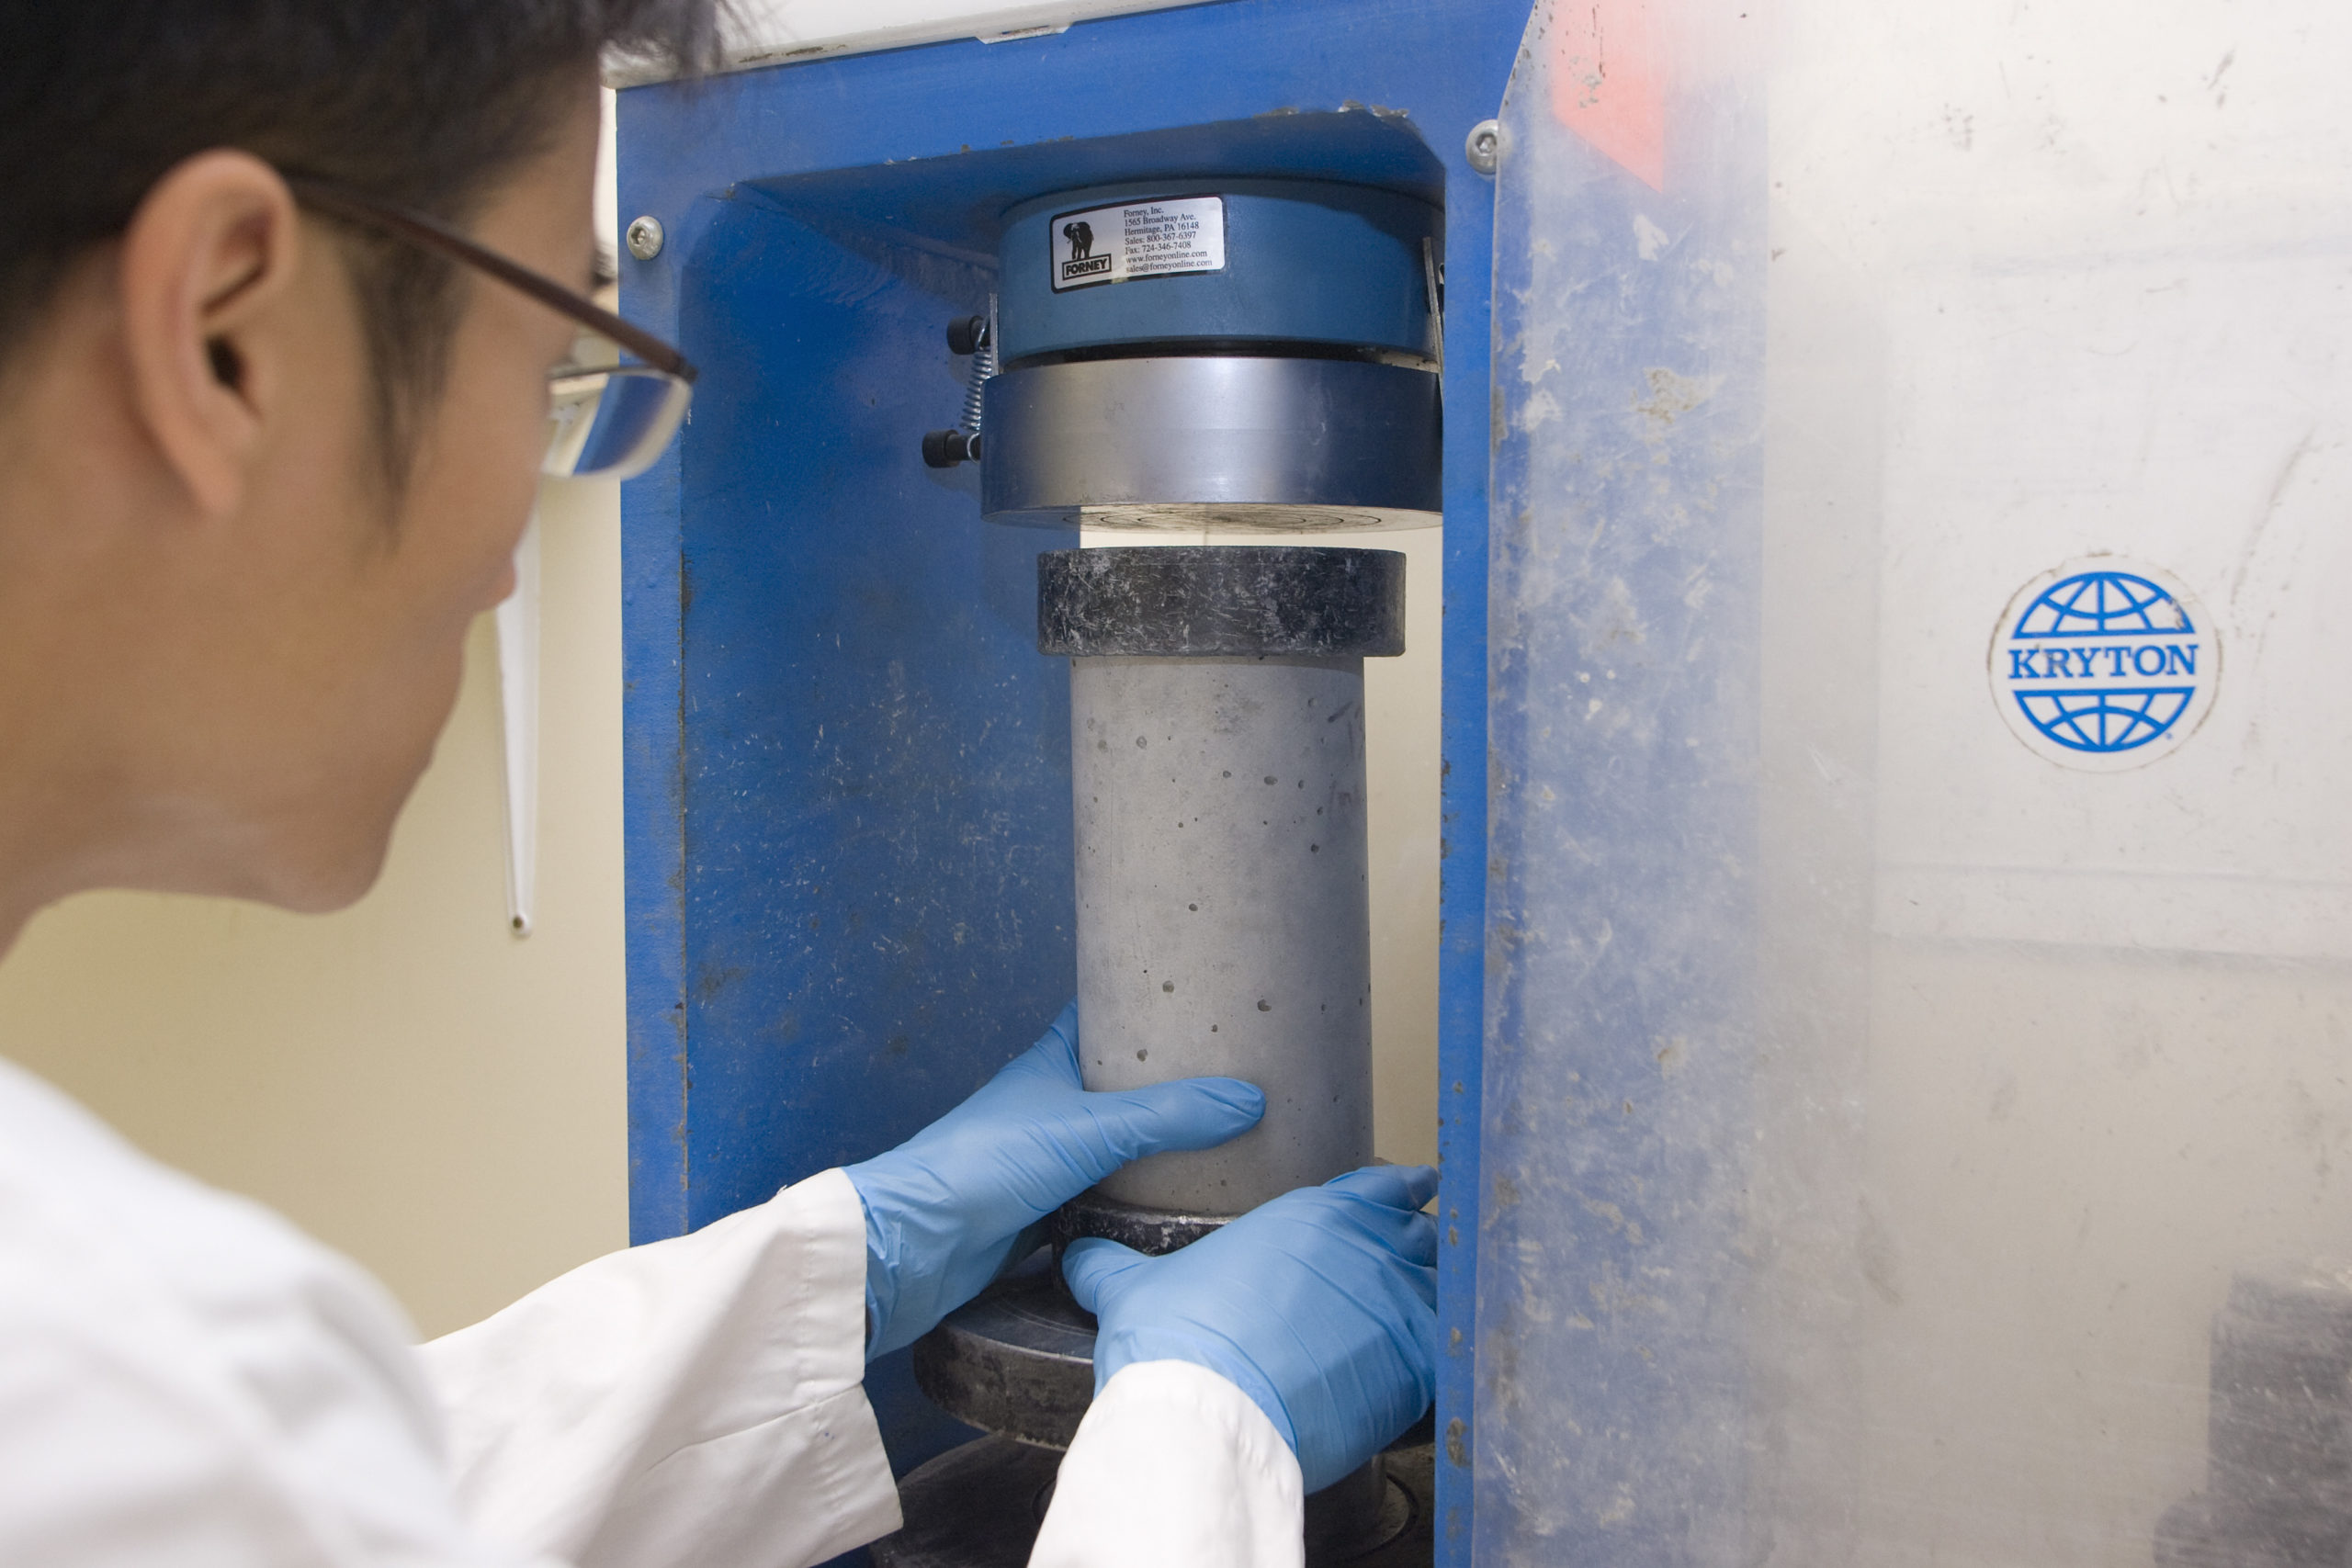
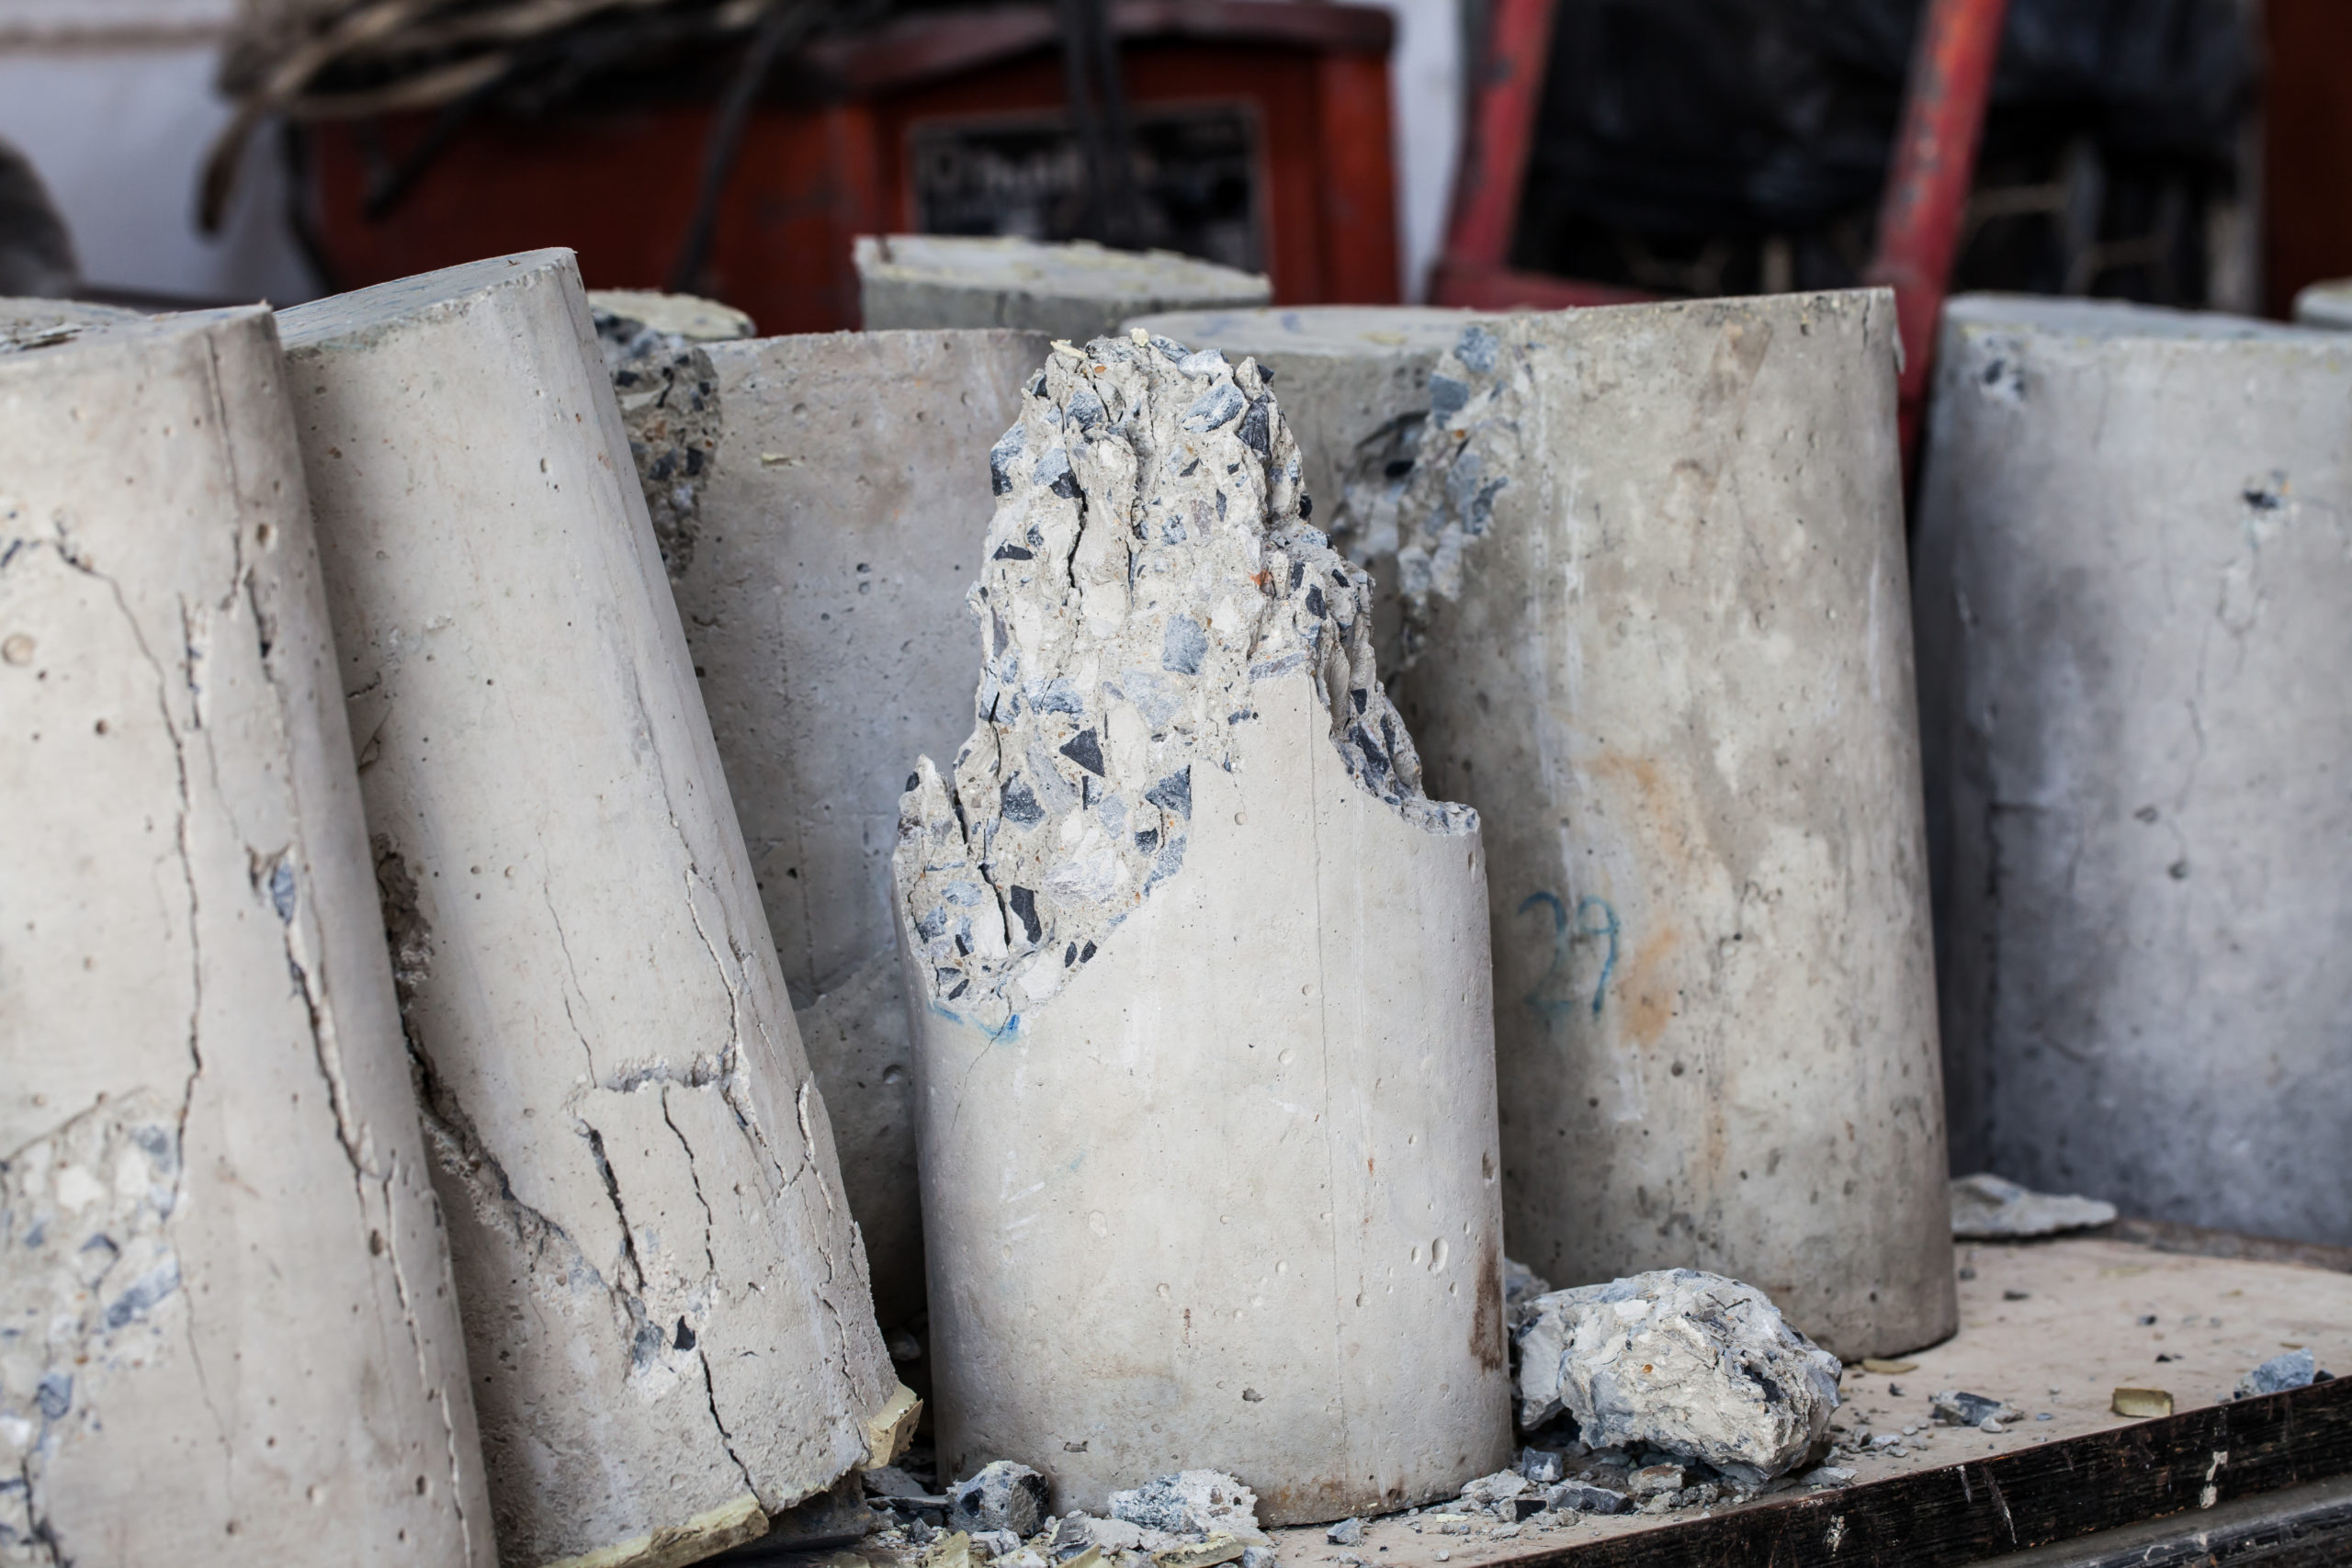
Break tests are the traditional and established way to test the compressive strength of concrete. And they do so by using a destructive approach by crushing concrete cylinders or cubes and measuring the pressure of that crushing until the cylinder or cube breaks.
Under this method, test samples are casted and cured either at the jobsite or in a testing laboratory. When placed on-site, the samples are placed as close as possible to the structure to replicate the same curing conditions. These are also known as field-cured specimens. In testing labs, the samples are cured under controlled conditions. For instance, these may be in water tanks that are kept at a constant temperature, which is also known as standard curing.
After a certain amount of curing time, the samples undergo break tests. Each sample is placed in a compression test machine. Then, pressure is applied to the top and bottom of each sample until the samples break. Once they fail to withstand the pressure, the compressive strength can be calculated, which is done by dividing the failing load with the cross-sectional area resisting the load.
The results of these tests are used to validate concrete strength for a wide range of factors. These can include helping contractors determine when to move to the next step in construction and helping them document and validate the 28-day strength of concrete.
What Are the Advantages and Limitations of This Specific Test?
Break tests are common for a good reason. But that doesn’t mean they don’t come with limitations.
dvantages
Break tests are one of the most commonly used methods for estimating the compressive strength of concrete. They’re accepted internationally and have been standardized in almost every country.
Limitations
But do break tests accurately represent the actual strength of a structure?
One of the main limitations of these tests is the difference of mass between the concrete samples and the concrete structure. This difference is important because it affects the heat emitted during the cement hydration process. And the amount of emitted heat affects the concrete’s strength development speed.
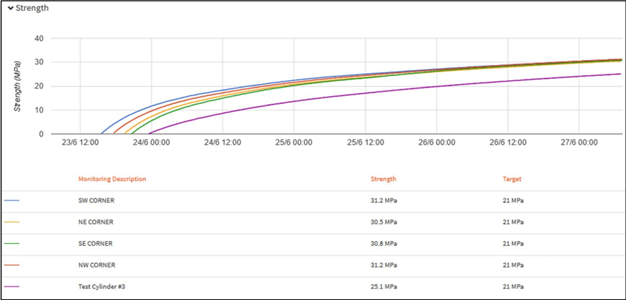
For instance, let’s observe the following graph. We can see that the strength development in the test sample (represented in purple) does not follow the same development as the corners of a mass structure. Instead, it has a slower strength development due to the temperature history of the cylinder being lower.
Additionally, when using break tests, it is assumed that the structure cures at the same speed everywhere. However, in a structure, there are zones that will cure faster than others due to temperature differences. For instance, a concrete structure’s surface is normally more exposed to cold air, winds, and different weather conditions. These will all directly affect the strength development of the concrete at the surface.
For all these reasons, there is room for debate about whether break tests are representative of the structure’s actual in-place strength. The smaller volume and lower temperatures of samples will always result in a different rate of strength development when compared to the volume and temperature of a full concrete structure.

With These Limitations, Can Break Test Results Be Trusted?
Low breaks or inconsistent compressive strength test results is a common problem in the construction industry. Still, there are many standard procedures that describe how to properly handle and prepare test samples. However, these procedures are often not done according to the specifications, producing inconsistent results.
That makes it difficult to identify what the cause of those results might be. A low break result could indicate that the concrete mix was not designed well. It could also indicate that the supplied material was not up to the specifications. But it might also have happened for a number of other reasons. These might be because the samples were not prepared or cured properly, they were damaged during transport, or the testing machine was not calibrated properly.
With no clear identifiable cause, a project’s success will quickly become uncertain as it would be harder to determine how to proceed next, wasting a lot of time as contractors wait while they investigate different possible causes.

What about the Maturity Method? How Does It Work?
The maturity method is a non-destructive method that can be used to estimate the early-age strength development of concrete.
Under this method, you start by performing a maturity calibration in a laboratory to find the correlation between time, temperature, and strength. During this calibration, you make some samples with a concrete mixture that will be used in a project and instrument some of them with temperature sensors and recording devices. The samples are then cured under the same conditions, and the temperature history is measured using the sensors. Workers will then conduct break tests on those samples at different test ages to determine their compressive strength.
With the strength data from the break tests and the maturity from the temperature history, a best-fitting curve (or a maturity curve) is plotted through the data points. This curve represents the strength-maturity relationship for the concrete mix.
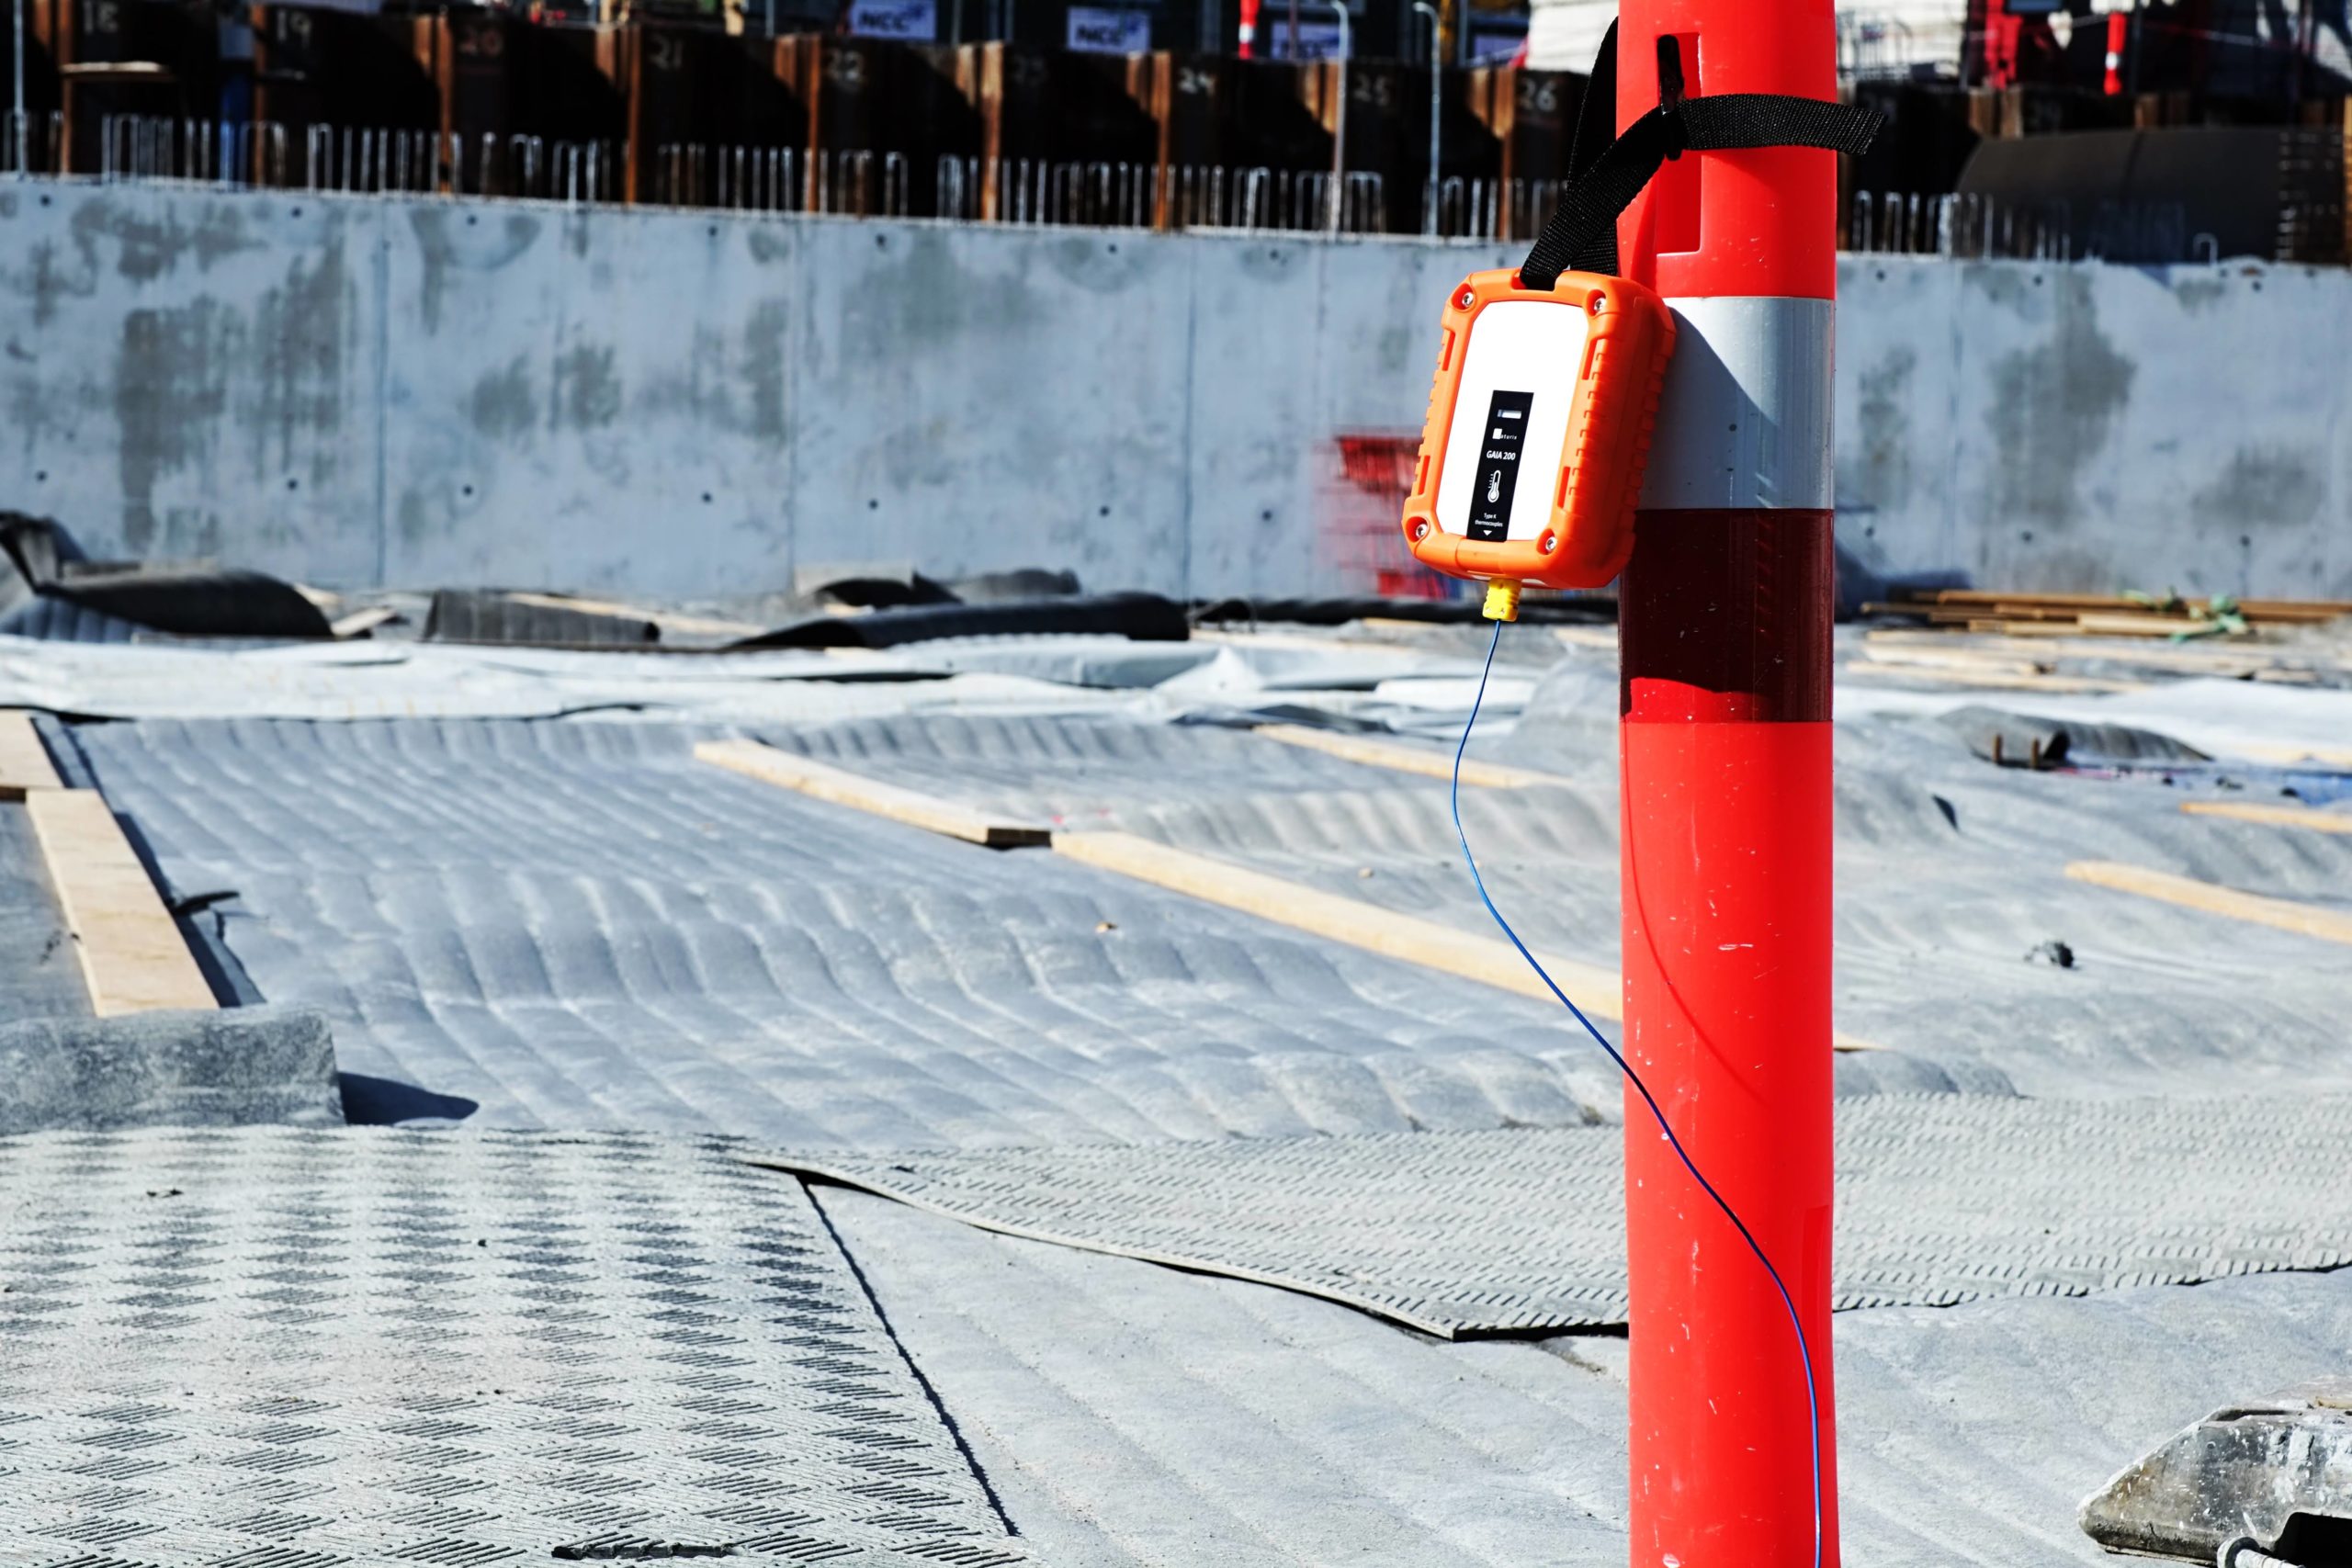
After having performed this maturity calibration, the in-place concrete strength can be estimated by placing temperature sensors in the concrete structure and using a maturity system like Maturix. With Maturix, both the maturity from the structure’s temperature history and the in-place concrete strength is automatically calculated in real time.
What Advantages and Limitations Can Contractors Expect from It?
Much like conducting break tests, using Maturix has its own set of pros and cons for contractors to consider.
dvantages
Maturix overcomes many of the limitations that come with break tests.
To start, using Maturix greatly reduces the use of testing facilities and personnel. That is because it gathers information through temperature sensors that are embedded into the concrete. This results in time and cost savings on making, handling, transporting, and testing concrete samples.
On top of that, it is easy to get clear identifiable results. So instead of making guesses about when the concrete’s strength is sufficient to test the samples, contractors can use the maturity method, which indicates when the concrete has reached the desired strength threshold. That eliminates a lot of uncertainty and helps projects become more efficient, data-driven, and proactive, which improves decision-making.
Contractors can also get a more accurate estimation of their structure’s in-place strength development when using the maturity method. It allows them to monitor the actual conditions of their structure, including the temperature and strength development in critical zones.
At the same time, a maturity method system like Maturix offers real-time remote data collection. So contractors can continuously monitor their structure. That gives them a more complete overview of the curing process and the concrete’s compressive strength development. In turn, that can help them ensure that they do not exceed certain temperatures and that they keep the concrete’s core and surface differential temperatures within specified thresholds.
Limitations
Despite its many advantages, the maturity method does have limitations. The first one is that it is required to perform a maturity calibration for each concrete mix to estimate the compressive strength. The second is that high variances in the delivered batching can affect the accuracy of the strength estimation, since the mix designs will be different. The third is that many countries still require 28-day compressive strength tests, which the maturity method cannot replace. However, the number of break tests used for other purposes, such as determining when to continue with different processes, can be significantly reduced.
What Does This Mean for Your Construction?
There are still some limitations when it comes to a full replacement of break tests. After all, the results of these are often a requirement to comply with concrete construction standards. However, the often inaccurate results produced by break tests make them less efficient. But Maturix can use the actual temperature history of a concrete structure to give contractors a more accurate estimation of the concrete’s compressive strength.
So which method should you go with? The best approach is to use each method based on what they are well-suited to do.
With the maturity method, for instance, contractors get continuous information on critical items like temperature samples every 20 minutes. That is great for keeping track of the curing process. And that is especially the case when in comparison to break test samples that are only done after seven, 14, or 28 days. In short, having the data that comes from the maturity method will give you a much better idea of where your concrete is heading and when you can expect to achieve the required strength for your structure.
On the other hand, break tests are good for validating your choice of concrete. More specifically, it validates that your chosen concrete has the ability to reach the required strength within the specified time. That also confirms when your in-situ casted concrete has reached the right number of maturity days. So you know that your concrete strength matches the requirement.
In the end, depending on your project’s needs, monitoring your concrete pour’s development continuously, validating your concrete strength, or using a combination of the two may be the most ideal method. And if efficiency is your key concern, Maturix’s maturity method may offer the most assistance with its ability to speed up construction work and enhance decision-making.

The post Break Tests vs the Maturity Method appeared first on Kryton.
Did you miss our previous article…
https://www.concretestyle.net/?p=1358


 .
.