Building Artificial Reefs: What to Expect

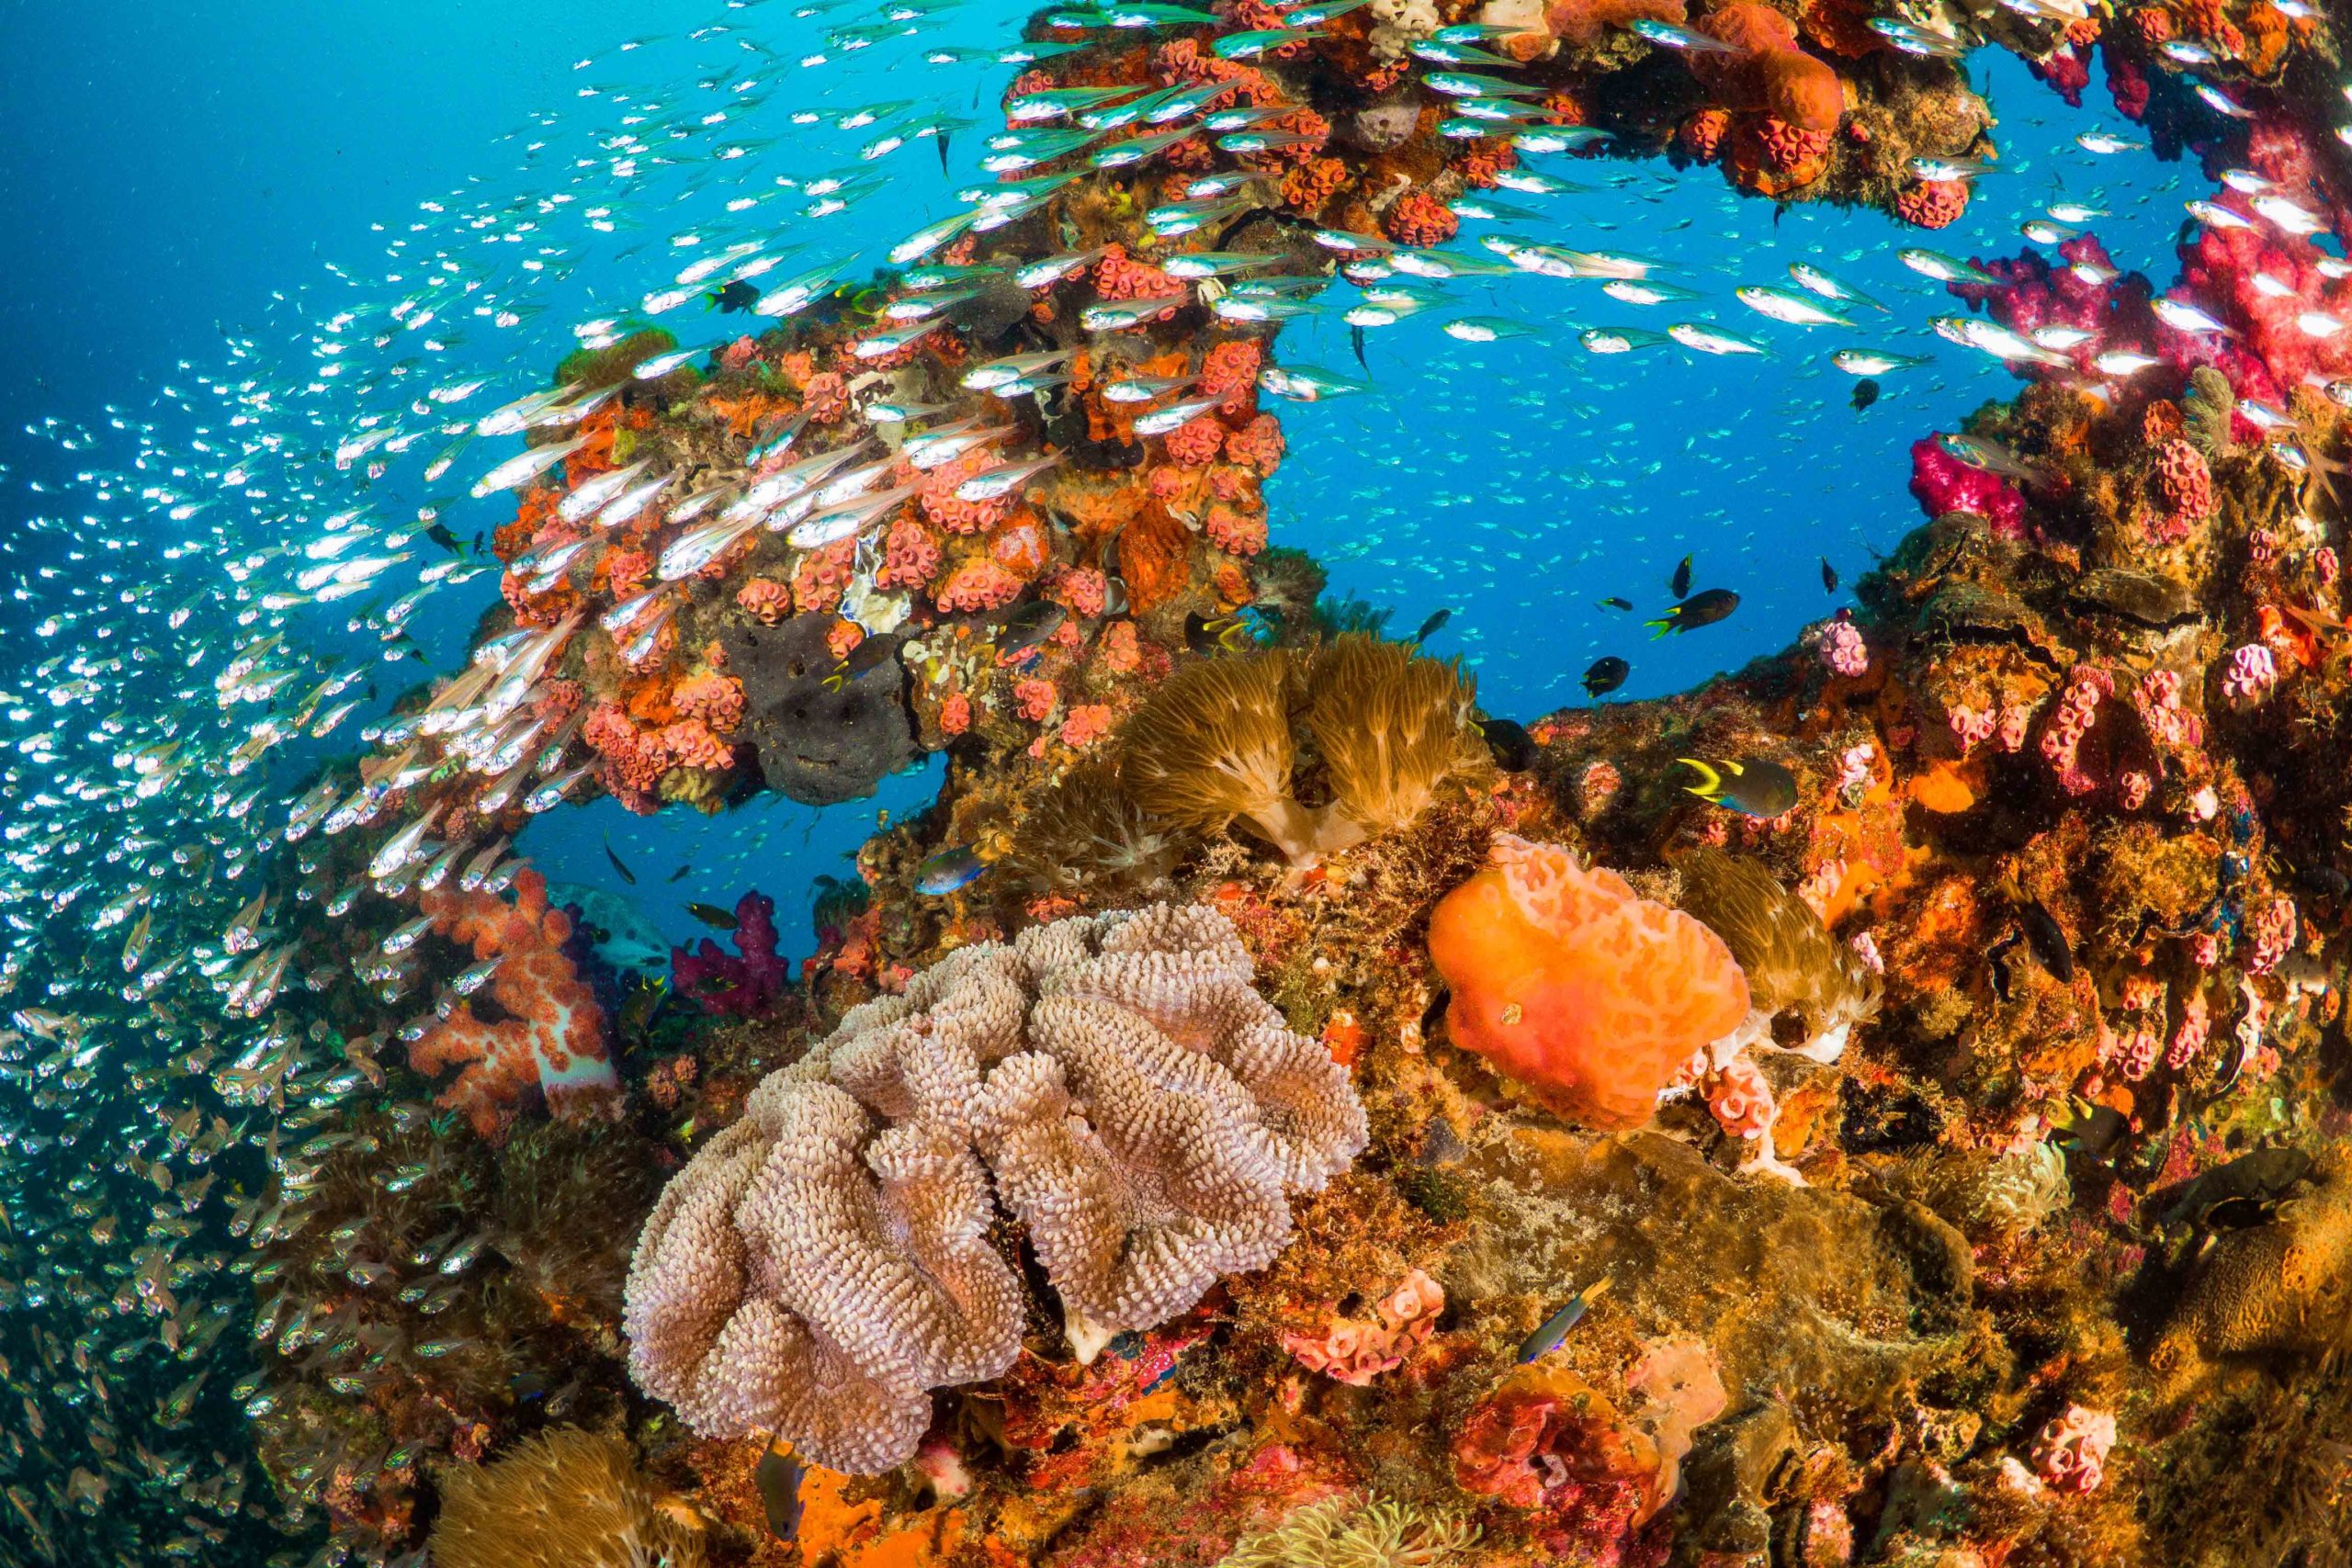
Lately, there’s been an increase in interest over the well-being of coral reefs. These marine habitats represent an estimated $2.7 trillion in ecosystem service value and support around 25% of all marine life after all. But we have already lost 50% of the world’s reefs at this point. And there appears to have been no specific global funding to help develop the protection and restoration of these reefs in the past.

Recognizing this, a coalition of partners from the 75th session of the United Nations General Assembly created the Global Fund for Coral Reefs. With this fund, they hope to raise and invest $500 million (USD) to support programs that will increase the resilience of coral reefs.

That means you may soon see more construction requests for artificial reefs. These sorts of reefs are manufactured constructs designed to promote the growth of coral reefs and provide marine life with shelter. It’s a great way to secure a profitable tender and give back to the environment all at the same time.

But if you do decide to take on an artificial reef project, what can you expect?

Three different types of reefs are shown side by side in a collage to demonstrate the wide variety of requests a contractor might get for building artificial reefs.

You May See a Wide Variety of Structural Requests

Over the years, the innovation for building artificial reefs has only increased. People from all over the world have their own ideas on how to build reefs effectively. So when you do encounter such a project, you might find some unique structural requests. Here are just some of the more well-known ones you might end up with.

They May Be Complex Like a Habitat Skirt

If you win a bid for an artificial reef construction project from a governmental authority, your work may be fairly large and complex.

For instance, back in 2008, the Vancouver Convention Centre used governmental funds to include a habitat skirt worth $8.3 million. The first of its kind at the time, this project used 362 precast concrete slats. They were fit into 76 frames and arranged to look like a large five-tiered staircase. That extended the center’s shoreline by 477 m (1,564.96 ft) and added 6,122 m2 (65,896.66 ft2) of marine habitat surface area.

That is no easy feat for a project that had never been done before! As one of the University of British Columbia’s blogs notes, this amount of space is equivalent to “the length of five Canadian football fields and the floor space of the entire White House.”

It’s also not the only government project thinking big. Further south, down in the United States of America (USA), in San Diego, the port there has started to install a sea wall. Designed to protect the edges of Harbor Island, the wall is expected to help restore the island’s marine ecosystem.

It makes use of a structure that consists of the Coastalock system, which interlocks hollow concrete units to create habitats for oysters, sea stars, algae, and a variety of other marine wildlife.

The port hopes to use 72 of the 3.5-tonne modules of this system to replace the island’s current riprap.

With those two projects in mind, you can see that certain artificial reef projects will involve a decent amount of construction material, some intricate design input, and a keen contractor eye to keep everything working smoothly.

Or They May Be a Smaller Affair Using Reef Balls or Cubes

Not every artificial reef project is so extensive of course. There are plenty around the world that go to organizations like the Reef Ball Foundation and ARC Marine to install concrete structures in waters. These structures may be circular or more cube-like in shape, and they can range in size. Some may be as small as 0.3 m (1 ft) or so or as big as 1.5 m (5 ft) or more. In either case, the structures come with holes and various surface textures to offer marine wildlife places to rest and hide from predators that still look and feel like natural reefs.

They aren’t always interlocked and don’t need any additional design work. So it’s easier for people to order these structures from the organizations making them or from contractors for these organizations and have either group deploy the structures into the water.

It also makes it a less complex project on your end if you win a contracting tender for an organization that already handles this sort of work.

It May Even Involve Just Deploying Materials in a Specific Part of a Marine Area

Sometimes building artificial reefs is all about the materials and nothing else. In some cases, that might mean placing materials like defunct ships, oil rigs, or some other old, large structure into open waters.

In other cases, it might mean doing the same but with defunct subway cars! Running with that last idea, the State of Delaware in the USA has been pushing old New York City Redbird subway train cars into the open waters off the coast of Slaughter Beach since 1996. However, to make sure these cars are marine-friendly, they strip them of any glass, seats, signs, wheels, and petroleum products before dumping them. That way, water can flow in and out of the old vehicles, allowing larvae from sea invertebrates to safely drift in and gain shelter, which in turn, lets them flourish and feed other marine animals.

An even simpler version of this project that you might encounter could be a request to place concrete pipes or steel beams on the ocean floor. For instance, further south from Delaware, in Pinellas County, Florida, such projects have helped to create around 42 reefs.

A wide array of construction materials, including wood and steel, are laid out on the ground of a worksite.

These Requests Can’t Just Be Fulfilled with Any Material, However

While some projects will already have a specific material in mind like those using the reef balls or reef cubes, there will be others with more leeway. And when that happens, you’ll need to carefully consider what material you use.

Think of it as building a home of sorts. You wouldn’t just use or reuse any old material for a person’s home. It could end up being structurally unsound or even toxic for the person who chooses to live there.

The same can be said for building artificial reefs. If you choose to build reefs by reusing waste like old tires or polyvinyl chloride, you’ll soon discover that neither material is the right kind for marine wildlife to call home. They’re usually too small, for one. So organisms needed to create reefs can’t grow on them. And they’re also very unstable. The waves can carry them to any part of the ocean floor easily, which is not appealing to marine wildlife as reefs are meant to be naturally anchored to the seabed. What’s worse though is that they can both release toxic chemicals, transforming their potential to be homes into a danger zone for any aquatic creature nearby.

So, what can you use instead?

Concrete Is Often the Preferred Material for Building Artificial Reefs

You might have guessed it already considering how often previous projects have used it already. But concrete really is one of the more preferred materials for building artificial reefs. And there are a number of reasons why that’s the case.

According to the New Heaven Reef Conservation Program, some of those reasons have everything to do with the composition and versatility of concrete.

Much like reefs, the composition of concrete makes use of the chemical compound calcium carbonate. Reefs get it naturally through coralline red algae, which form a calcareous skeleton that supports coral reefs by cementing them together. Meanwhile, concrete often gets the compound through common building materials like limestone. But regardless of how they get the compound, that makes concrete at least seem more natural to marine wildlife.

That’s not all that gives its composition such an appeal. Concrete is also innately strong and heavy enough to remain anchored at the bottom of any waters it’s placed in and lasts for a long time, giving marine wildlife a secure shelter for protection or habitation.

But what about concrete versatility?

Well, because concrete can be constructed into almost any shape and size, it gives you an opportunity to give an artificial reef any number of nooks and crannies that fishes and other aquatic wildlife like to hide in.

However, There Are a Few Other Materials You Could Work With

With that said, concrete isn’t the only material that people have gone for when building artificial reefs. They have also gone with the following materials using unique methods:

Electrified steelUsing biorock technology, ecologists in Indonesia have been able to form artificial reefs with electrically charged steel structures. Using a low-voltage current to charge the steel, the ecologists create an interaction between the electricity and the minerals in the seawater. That reaction causes limestone to grow on the charged steel. That growth eventually solidifies, forming reefs much quicker than they naturally would otherwise. This method has also shown to heal injured coral up to 20 times faster than other methods.

Steel spiders Even without electricity, steel remains a good material for building artificial reefs. For instance, people off the coast of an Indonesian island have been attaching parts of coral reefs to rust-protected reinforcing steel structures known as steel spiders. Over time, this process increased the amount of coral on the steel spiders by over 60%. At least 42 different coral species were growing on the steel spiders because of this. And in the rubble surrounding the steel spiders, people found at least 58 species.

Glass bottles in concrete While this method still uses concrete, the main focus is the glass bottles embedded in the concrete. As the concrete keeps the glass bottles anchored securely, the bottles themselves act as a way to transplant broken or nursery corals to attract marine life to the area and eventually create a reef and feeding hub for fish.

Kryton's Con-Fume, KIM, and Hard-Cem solutions sit next to each other in their packaging against a white background.

If You Do Go with Concrete, Consider Increasing Its Durability

Con-Fume One major artificial reef organization in the USA, the Reef Ball Foundation, requires silica fume in the specs for their artificial reefs. So if you want to follow their design as a blueprint for your own artificial reef, you may want to apply our Con-Fume solution. It is a silica fume product made from pozzolanic material to produce high-performance concrete. It comes in ready-mix bags and meets ASTM and CSA standards for silica fume.

Hard-Cem If you happen to be placing your artificial reef project in waters with swift currents, you may want to add Hard-Cem to your concrete mix. With fast-flowing water, there’s a higher chance for debris to bump up against your reef structure, gradually eroding away its surface and even potentially causing cracks. That surface will likely weaken after some time, leaving it vulnerable to losing aggregate and cement binders to the fast-moving water. But with Hard-Cem, this possibility becomes less likely. As an integral hardener, Hard-Cem increases the abrasion and erosion resistance of concrete and doubles concrete wear life even under harsh conditions. So it is capable of giving your artificial reef the durability it needs to withstand the abrasive and erosive forces in the water.

Krystol Internal Membrane
™
(KIM Another issue that can threaten your artificial reef’s longevity is a sulfate attack. Sometimes caused by industrial water pollution or seawater, a sulfate attack can chemically change the reef’s cement, weakening its bond with the surrounding aggregate. That can then cause extensive cracking and wear, ruining the structural integrity of your reef. Luckily, KIM can safeguard your reef from such a situation. Using Krystol technology, it enables your concrete to react chemically to water, forming needle-shaped crystals that fill up its capillaries and micro-cracks. That ensures the sulfate in the water cannot get through your concrete and damage its structure. KIM was also one of the top-performing products at preventing the corrosion of steel reinforcement during a 10-year study in a marine environment by the University of Hawaii. Moreover, KIM is also NSF-certified as safe for potable water and has the Singapore Green Label, proving that it is non-toxic.

A shoal of fish swim past a vibrant artificial reef.

You’ll Soon Have an Artificial Reef Perfect for Clients and Marine Life

Knowing what to expect and what tools to consider now, you’ll be ready to create a marine-friendly artificial reef of your own in the future. Just keep in mind the potential scope, materials, and obstacles you might encounter, and you’ll have an artificial reef up in no time.

Download our e-book today to find out why the industry is moving away from surface-applied concrete hardeners.

The post Building Artificial Reefs: What to Expect appeared first on Kryton.

Finding the Right Concrete Company for Your Commercial Project

Any business owner can expect to run into at least one concrete project during the span of their commercial business operation. Hiring the right concrete company for this project will be the difference between a good-quality, long-standing product and a cracked slab.

When looking for a commercial concrete contractor, there are several traits you’ll need to seek out.

The right concrete contractor will be:

1. Reputable

A concrete company’s reputation is just as important as the quality of the concrete it supplies, especially if you plan on working with this company for the long haul.

Check out the company’s reviews across the web and ask around to see who your friends or family may recommend. LinkedIn is a good place to ask other business owners for recommendations.

Ask past customers how the company in question ranks on communication, customer service, completion times, cleanliness, reliability, and price. After you’ve done your research, continue looking for a company that is both skilled and reliable.    

2. Skilled

You’ll want to hire a concrete company that specializes in your specific needs. For example, if you need a decorative concrete job done, don’t hire just any concrete company–hire one that is skilled in decorative concrete.

See if you can find pictures of the company’s work to assess their skill, and call to make sure they have all the materials in-house. If they don’t, you’ll need to pay extra for them to outsource the materials.  

3. Reliable

Reliability is one of the most important traits to look for in a concrete company. There’s nothing worse than hiring a contractor that shows up late, doesn’t follow the timeline, and fails to communicate about important changes.

The reliability of a company can also be proven through references and recommendations. Any professional company will be able to show you a portfolio or showcase pictures of their work.

At Port Aggregates, our skilled contractors have over 40 years’ worth of experience ingrained into our pours. You can view our work on our site or Facebook page, and contact us for specific images. Whether you’re looking to complete a residential or commercial concrete project, we’ve got you covered. Contact us today to request a quote

The post Finding the Right Concrete Company for Your Commercial Project appeared first on Port Aggregates.

Interview: Optimizing Concrete Compressive Strength Monitoring for a Treatment Plant

Interview: Optimizing Concrete Compressive Strength Monitoring for a Treatment Plant

Treating about 80% of San Francisco’s water since 1952, the Southeast Treatment Plant has been a critical structure for sanitizing the wastewater of San Francisco. However, the plant has been around for years, and now, many of its facilities need an upgrade.

Knowing this, the San Francisco Public Utilities Commission has started modernizing the plant. Part of this transformation includes replacing the treatment plant’s headworks facility with a new one. That will ensure the treatment plant will be able to more effectively remove debris and grit from the water while meeting the current seismic standards.

To construct this more modern headworks facility, the San Francisco Public Utilities Commission has collaborated in a joint venture with The Walsh Group Ltd. and Sundt. And we are pleased to note that we are helping The Walsh Group Ltd. optimize their work in this venture with our Maturix Smart Concrete Sensors.

Our Maturix specialist, Kris Till, got to discuss this in a recent video interview that he conducted (which you can see here). And in this article, you’ll get to see that discussion along with some extra details on the topic.

Why don’t we get started by having you tell us who you are, who you work for, and what you’re building?

My name is Tanner Santo. I’m a superintendent for The Walsh Group here in San Francisco, California. We are building the new headworks for the Southeast Treatment Plant. It’s going to be up to a 300-million-gallon-per-day capacity in the wet season. We’re looking at probably a good two years of structural concrete, which will primarily be my focus.

What do you consider to be the most important factor when building a project like this?

I think one of the biggest things I look for as a superintendent is to maintain efficiency while also preserving quality. There are a lot of moving parts and challenging logistics on this project. And what we need to do is just get our crews into a rhythm.

So, why are you monitoring concrete in this project?

That’s actually a very good question. We’re doing a lot of vertical walls on this job. I think we have 300 to 400 different wall placements. And the big thing for us is that we cannot strip those forms until we reach a minimum compressive strength.

What would you have done in the past to monitor your concrete compressive strength?

So, in the past, in situations like this, we pour a wall, say on a Monday, and take a bunch of concrete cylinders. By Tuesday morning, they’re sent off to a lab. If I want early breaks to remove the formwork, I need to take extra cylinders.

The extra cylinders can be costly when you talk about hundreds of wall placements. So taking and breaking extra cylinders for every placement adds up very quickly.

What’s even more of a hassle is getting those break results. So if I put in a 30-foot-tall [9.14-meter-tall] concrete wall on a Monday, Tuesday morning, I’m waiting on a testing lab to give me early breaks back and what I need them to tell me is that the concrete has reached a minimum strength. So in that morning time when I’m waiting for a break result or for the testing lab, I have a crew of guys who are basically not being efficient. They can’t strip the formwork yet.

nd what’s your current concrete monitoring process like now?

We put a few thermocouples with the Maturix Sensors into the wall at the time of placement, and thanks to the maturity curve that we’re able to calculate with the help of CEMEX, our concrete provider, we actually get a live readout of compressive strength. If we had never run this maturity curve for these sensors or monitored the live compressive strength with the sensors, I don’t think we ever would have realized how quickly we were getting concrete strength on this job.

It gives me a lot of temperature data as well. Had those sensors not been there, we wouldn’t have realized that we are working with a relatively hot mix. We now exercise some caution with some of those thicker placements that I don’t think we ever would have previously because we just wouldn’t have known what type of internal temperatures we were getting on this job. That information alone has been a big help as far as planning and scheduling goes.

It’s even so streamlined that I have notifications set up to my cell phone. I’m not waiting on a call from a testing lab. I’m not hounding a testing lab. I actually get a ding on my phone, but on this project, it’s a bit unique. It’s actually kind of in the middle of the night or the early, early morning when it tells me that a wall has reached 1,250 psi [8.62 MPa]. That way at 7 am, when the guys show up to work, we’re not waiting on anything. We immediately get to work taking the forms off. I know the wall has reached a compressive strength where it’s safe to do so. There’s really no second-guessing anything. And that helps with the logistics of cranes and organizing manpower.

Why did you specifically choose Maturix?

What made Maturix the number one choice was just the cost-effectiveness of it. A lot of the competitors have one-time-use sensors where you’re paying up around $100 a sensor and you embed it into the concrete. In every single pour, that’s $100 down the drain whereas Maturix technology is actually better because I don’t have to go around and capture the data with Bluetooth. It’s all done over a cloud network. It’s sent directly to my phone like I mentioned. I don’t have to pay someone to go around and collect data via Bluetooth. So in reality, I’m paying less for a better product.

So it seems Maturix offers cost-effective concrete compressive strength and temperature monitoring. It also documents everything related to this. Has that helped you with quality control procedures?

Yeah, definitely. It just basically organizes all our pours. I mean, I can go back to stuff I poured a month ago and see that Maturix records the exact time of placement.

What would you tell someone who is considering Maturix?

It’s streamlined. It’s easy. As far as cost-effective, it’s not even close compared to the competitors out there with the one-time-use sensors. And the labor you save in collecting the data is also a huge cost saving as well. So we’ve just been very happy with what these sensors have provided for us here.

Thank you so much for taking the time to talk with us. We really appreciate it.

No problem. You guys are helping us out a lot on this project. We got a good thing going here, so I’m happy to help out.

*Banner photo by Pi.1415926535, CC BY-SA 4.0 https://creativecommons.org/licenses/by-sa/4.0>, via Wikimedia Commons

Convenient. Cost-Effective. Remote. Concrete monitoring with Maturix. Book a demo today!

The post Interview: Optimizing Concrete Compressive Strength Monitoring for a Treatment Plant appeared first on Kryton.

What can Precast Concrete be Used For?

Known for its immense strength, durability, and endurance, concrete is the number one building material in the world. It’s been used for centuries and can last for thousands of years.

There are several different types of concrete, but today we’re going to take a look at precast and its many uses. 

What is precast concrete?

Precast concrete is formed using a mold and is often used to create columns, beams, or parking curbs. It can be produced in mass quantities due to specifications and codes that are already established. This building process is extremely efficient, allowing for hundreds of large structures to be built in just a few weeks.

The purpose of precast and its many uses

Precast concrete is built above the ground and can be used to stabilize large pieces of earth or hold back dirt. This makes it a great choice for building large retaining walls or smaller retention ponds. 

Three-sided bridges and box culverts for marshland and stream crossings also call for precast concrete. A strong material is particularly essential for structures like these. Otherwise, traveling over this type of land would be impossible without damaging the environment. 

In certain cases, custom pieces can even be made to meet your unique needs; for example, creating a vault using more than one piece when preexisting blockages are in the way. In these circumstances, individual precast panels are constructed and the vaults are then pieced together in place. Other custom examples may include railroad crossings or boat ramps.

Precast concrete is also used to construct buried infrastructure like catch basins, manholes, and vaults. These structures can be used to house telecommunication or electrical junction boxes, move storm water or sewage, and retain water.

Understanding the benefits

One of the biggest perks of precast concrete is that it’s ready to install when you are. This is one of the main shortcomings of site-casted concrete, because weather can delay the pour. Because precast concrete is created within a controlled environment, this is not an issue.

Another major benefit is the fact that strength-testing has already occurred before delivery day. Site-casted concrete, however, requires extra time and effort on the day of the pour to add rebar, set forms, and monitor the product.

When it comes to the production of precast concrete, the process alone is extremely sustainable. At Port Aggregates, all of our concrete products are made with the highest quality materials. It’s why we’ve been trusted for over 40 years! Contact us today to request a quote

The post What can Precast Concrete be Used For? appeared first on Port Aggregates.

How to Remove Stains From Concrete Flooring

How to Remove Stains From Concrete Flooring

One of the biggest concerns that people have when it comes to concrete flooring is how to clean it efficiently.

Fortunately, removing stains from a concrete floor is not nearly as difficult or complicated as it sounds.

Here are a few stain removal tricks to help you maintain spectacular looking concrete floors.

Removing paint stains

Timing is everything when it comes to a paint stain on concrete flooring. For the best results, it’s critical to act as quickly as possible.

For a fresh spill, start by putting on goggles for eye protection, then mix together one cup of trisodium phosphate (TSP) with four liters of hot water. Pour the mixture over the paint, scrub it with a long brush, and pressure rinse it until the stain is removed.

Unfortunately, if you’re dealing with a very large spill, there may always be a slight hint of color left on the concrete.

Removing oil

Oil stains are some of the ugliest, most stubborn stains out there. If possible, try to absorb the oil as soon as you notice it so that it doesn’t penetrate into the concrete.

Believe it or not, your best bet against a fresh oil stain is to pour cat litter or mud over it, then scrub with a stiff brush or broom. Leave the cat litter or mud on top of the stain for at least an hour before sweeping it away. For tougher stains, leave it overnight.

If this doesn’t completely do the trick, mix together one cup of TSP with hot water, then pour this on top of the stain. Let it sit for at least 30 minutes before scrubbing with a rigid nylon brush and hosing it off with pressurized water.

Removing mud

When mud is left for too long on concrete flooring, it can leave an ugly brown stain. Fortunately, this is one of the easiest stains to remove. Simply mix together some dishwashing detergent and warm water into a spray bottle, shake it, and squirt it over the stain. Let it sit for around 10 minutes, then scrub it off with a nylon brush and rinse with a high-pressure hose.

Removing rust stains

Unfortunately, rust stains on concrete are quite difficult to remove entirely. Large, old rust stains often require a special rust remover. But for smaller, newer rust stains, using vinegar is your best bet.

Just pour it on the stain, let it sit for at least 10 minutes before scrubbing with a nylon brush, and its acidic properties will eat away the rust. Rinsing and repeating may be required.

Looking for more tips on concrete and how to clean it? Check out the Port Aggregates blog

The post How to Remove Stains From Concrete Flooring appeared first on Port Aggregates.

4 Steps to Prepare Your Stamped Concrete for Summer

4 Steps to Prepare Your Stamped Concrete for Summer

When it comes to taking care of stamped concrete, summer is the best season to do so.

With temperatures rising in Louisiana, now is the time to start preparing your concrete for the warmer weather to come.

To increase the longevity of your decorative concrete, you must follow the following 4 steps when preparing your slab for summer.

1. Make sure you don’t need to strip your concrete

After a particularly harsh winter (like the record-breaking freeze of 2020), you may want to consider resealing your concrete.

Before you do so, however, you may wonder whether or not it’s necessary to strip off the old sealer first.

Fortunately, as long as your slab has been around longer than the early 2000s and has been stripped once before, it will not need stripping prior to resealing.

2. Power wash your slab

Once you’ve concluded whether or not you need to strip your stamped concrete, you’ll want to power wash it before you proceed with anything else.

Pollen, leaf, and tire stains can create such an eyesore. Power washing your slab is ideal for clearing away all the dirt, grime, and stains that have built up over the past year.

If you’ve got tough stains from oil and tar, you should use neutral soap, a solvent cleaner, or a degreaser first. This will loosen the stain which can then be sprayed off with the power washer.

3. Check for cracks

After your stamped concrete has been fully cleaned, scan it with your eyes for cracks. Most hairline fractures can be fixed on your own, but long and deep cracks may require you to replace the slab altogether.

4. Seal your concrete

If you haven’t resealed your concrete in the past three years, now is the best time to do so. Sealer is most effectively applied during warm weather on dry concrete. If you’re planning on sealing your concrete this spring, be sure to check the weather ahead of time, as the sealer will need a couple of days with no rain in order to dry properly.

Looking for more concrete tips and tricks? Check out the Port Aggregates blog

The post 4 Steps to Prepare Your Stamped Concrete for Summer appeared first on Port Aggregates.

Your Guide to Colored Concrete

Your Guide to Colored Concrete

When you think of concrete, you probably visualize a boring, grey slab.

Not many people associate concrete with color, but with the help of aesthetic treatments, it can really become a true work of art.

Before you start your next colored concrete project, it’s important to understand the advantages and ingredients involved.

Key benefits

1. Enhancing the appearance of your yard

The first and most obvious benefit of colored concrete is its aesthetic appeal. Whether you’re incorporating it into your new driveway or backyard patio, you’d be surprised at the difference a simple pop of color can make to your yard.

But beauty isn’t its only benefit.

2. Extra protection

The aesthetic treatments used to give colored concrete its pigment also provide a practical, wear-resistant coating and a beautiful finish. This will help your gorgeous slab maintain its fresh look over time, protecting it from weather and the damage of day-to-day use.

Understanding the two techniques

When it comes to concrete coloring, there are two main techniques:

1. Stirring the colorant into the concrete mix itself

This mixing technique is most commonly used in projects that desire one solid color. It works by mixing in a powdered pigment made up of inorganic minerals into the ready mix. This pigment is oftentimes made of chromium oxides and iron.

2. Stamping the concrete

Concrete stamping, on the other hand, is used for projects that require special patterns or designs. This method involves layering colorant on top of fresh concrete then stamping it with texturing molds. This colorant is either made up of synthetic or natural pigments.

Synthetic pigments

Synthetic pigments are made up of metallic oxides and are created through industrial processes. During these processes, minerals (the raw material) are refined to change their physio-chemical properties.

These physio-chemical properties are what link each metallic oxide to their specific color. Cobalt oxide, for example, is a metallic oxide used to create blue concrete.

Natural pigments

Natural pigments are derived from mineral deposits, and like synthetic pigments, they’re made up of metallic oxides and hydroxides. Iron is most commonly used to apply this pigmentation.

Get prettier, longer-lasting concrete by coloring it. At Port Aggregates, our professional concrete contractors are highly skilled in creating beautiful, precise pours every time. Contact us today to request a quote for your next project!

The post Your Guide to Colored Concrete appeared first on Port Aggregates.

Your Guide to Exposed Aggregate Concrete

Your Guide to Exposed Aggregate Concrete

Concrete is much more than just a place to park your car or a foundation for your home.

When starting your next project, it’s important to be aware of your options. This material can really be quite beautiful if you know what to ask for.

The possibilities are endless, but today, let’s take a closer look at exposed aggregate concrete.

What is exposed aggregate concrete?

Over 100 years old, the exposed aggregate technique quite literally “paved” the way for decorative concrete. 

The name pretty much says it all. In this type of concrete, a thin top layer is intentionally removed to expose the aggregate underneath. The exposed layer can include sandgravel, quartzite, or crushed glass.

Gravel is most commonly used, and a variety of different sizes are available to give you the desired texture that you want. See example below.

exposed aggregate concrete

Benefits of exposed aggregate

Exposed aggregate concrete offers infinite benefits. The most glaring advantage is its gorgeous appearance and satisfying texture. It adds a natural element to any area, and the three-dimensional surface is completely customizable. 

Another advantage to this type of decorative concrete is its increased traction. Rough surfaces like these are ideal for helping you keep your footing–even when the surface is wet or icy. It can even be customized to stick out at certain levels, if you so desire.

One of the main reasons why exposed aggregate is so popular is its price. It’s one of the least expensive types of decorative concrete available, and is an affordable alternative to standard, drab concrete.

Maintenance tips

Like any other type of concrete, exposed aggregate offers immense durability and is very low-maintenance. 

Proper care includes regular sweeping or rinsing off with a hose. It should also be resealed every couple of years. Fortunately, the color of the aggregates will not fade over time, and it’s actually the easiest type of decorative concrete to keep up with.

Repairs (if necessary) are quite simple, and exposed aggregate can last for decades if properly cared for and installed by professionals. At Port Aggregates, our expert concrete contractors have decades’ worth of experience built every pour. Contact us today to request a quote

The post Your Guide to Exposed Aggregate Concrete appeared first on Port Aggregates.

Did you miss our previous article…
https://www.concretestyle.net/?p=1124

How is Sand Used in the Construction Industry?

How is Sand Used in the Construction Industry?

Contrary to popular belief, there are several different forms of sand on this earth.

Some are engineered for specific construction purposes, and others are completely natural.

Sand has been used for many different purposes since the beginning of time, and is especially useful to the construction industry for many reasons.

Sand uses in the construction industry

Sand can be used to create many different types of concrete and mortars, and is typically used in formwork, slate, granite, concrete, porcelain, plaster, and brick for buildings.

It can also be used to construct public works like tunnels, refurbish work in railway facilities, demolish masonry, and abrasively clean concrete.

In environments that are high risk for chemical spills, silica sand is used to create slip-proof flooring.

How silica sand affects concrete

Silica sand in particular has a unique effect on concrete and poses quite a few risks.

While it is a commonly used material, it’s not 100% safe, and can seriously affect the health of workers who handle it.

When working with silica sand in poorly ventilated or closed spaces, dust clouds can occur that are harmful to the people and machinery within close proximity.

That being said, this material should only be used by a professional who is wearing the proper PPE and taking the appropriate preventative measures. It is not to be used for a DIY project.

At Port Aggregates, we offer 5 different types of sand:

Fill sand (unscreened/unwashed)Top soilFlume sand (screened/washed)Concrete sand (larger/coarse/washed)Mason sand (fine/coarse/washed)

Our sands are ideal for use in landscaping, concrete, and more. All of our materials are of the highest quality, and we service 24 areas across the state of Louisiana. Contact us today to request a quote

The post How is Sand Used in the Construction Industry? appeared first on Port Aggregates.

Always check our latest articles at…
https://www.concretestyle.net//category/politics

Out of the box – Vol. 3

Out of the box – Vol. 3

Index

IntroductionOur researchWhy cellulose based insulation?Why lime instead of cement?Cardboard+lime insulationMaking and applyingConclusions and further steps

Introduction

In recent decades, we have seen many examples of individuals and collectives striving for a greener way of building: reviving traditional methods, favouring natural materials or including recycled elements in the process to limit the footprint. Critical Concrete embraced this aim from the beginning: in 2017, we started experimenting with cardboard based insulation, and since then we have been working with other materials (such as wool or mycelium) that can serve as valid alternatives to the more polluting conventional ones.

This article presents our journey and experience researching and developing prototypes for cardboard-lime based insulation. We will talk about why we decided to dig deep in lime and cellulose based materials, and what we learnt from our prototyping. Our research aims to deepen the recycled paper and cardboard potential as top sustainable insulation material.

Interested in using this technology in your project?

Critical Studio can help!

Learn More!

Our research

More expensive rents means more people having to live in precarious houses1. Housing poverty is one of the leading global issues2, affecting more and more people in the face of climate change. The lack of thermal comfort causes serious health issues, and is responsible for many preventable deaths especially among vulnerable and low-income communities.

housing deprivation portugal eurostat

In Portugal, where we are based:

Almost 20% of people claimed to be unable to keep their home adequately warm during winter.335.7% said their house is not comfortable during summer.4In 2018, at least 1 in 5 people lived in a dwelling with a leaking roof, damp walls, floors or foundation, or rotting window frames or floor.5

Our priority is to improve housing conditions through affordable and environmentally friendly solutions. This is the main reason our research lab has been focusing on insulation methods for many years.

We started experimenting with cardboard in 2017 due to the high performance of cellulose insulation. Our research began considering the advantages and handicaps of using corrugated cardboard as an insulation panel. So far, we produced boxes and panels for a low-tech insulation system and applied it in different summer school houses, in cases the insulation could not be applied on the exterior of the house (houses in line, no space in the street, etc.).

Last  year, we decided to move forward in our research and try to find a method to continue producing cellulose based insulation but on a larger scale, since we wanted to continue developing an insulation that would be mineral-based and would not need to be covered by a plywood board or equivalent.

Why cellulose based insulation?

Cellulose is the organic compound mainly used to produce paper and cardboard, and other wide varieties of derivative products. It works as a very competitive insulation material, “depending on manu- facturing and method of installation and is comparable with other types of insulation. It has an average thermal conductivity being of about 0.040W/mK (similar to glass wool and rock wool insulations)”.6

Paper and cardboard are extensively used and abundant resource. Reusing and recycling cardboard locally7 also reduces emissions substantially:

In 2016, 50 660 000 tons of paper and cardboard wastage were produced in the European Union. Almost one million (905 137 tons) just in Portugal.8That year, within the EU, 72% of that waste was recycled. Whilst in Portugal the percentage was 55%.9

This means that we may take advantage of a material with high insulation performance and avoid it to become disposal waste at the same time, adding a new step in its life cycle.

There are many examples of people working with cellulose based materials, as the known papercrete, which since the ‘90s has been used in informal bio-constructions around the world. Papercrete is the building material made of paper pulp and cement. The main advantage of it is “that it is lightweight but sturdy enough to bear loads10. But we didn’t want to use cement.

Why lime instead of cement?

Cement became especially relevant during the industrial revolution and it has changed our way of building from that moment. Nowadays, as an affordable and easily accessible material, cement might seem like the perfect solution to achieve efficient results quickly. However, the environmental impacts of the material are very concerning.
The most well known fact is the excessive CO2 emission of the cement industry, as it occupies 3rd place of global CO2 emissions11. But even if emissions dropped gradually with innovation efforts to create the green concrete12, we are not sure if the industry will ever be fully sustainable and carbon-neutral.

Why? Because the environmental harm does not stop with CO2 emission. We have to keep in mind:

other additives in the material’s production,excessive water usage (both during cement production and construction with concrete), centralized production, lack of perspirability of cement forces the combination with other unbreathable, synthetic materials.complexity/impossibility of recycling concrete, often reinforced, combined with lightweight materials, or in complexe composite materials,that concrete surfaces trap heat and prevent rainwater absorption,

That makes cement the ultimate enemy in sustainable architecture. It is time to opt for alternatives. To reduce our environmental impact, we put our votes to use lime: in contrast to cement, lime is biodegradable and fully-recyclable (even on bricks), and most of the time, locally produced.

A more detailed article on cement will be published in the upcoming weeks, stay tuned!

Cardboard+lime insulation

Key concepts

Cardboard pulp: Cardboard soaked in water for at least 12 hours, and then squeezed and mixed with an electric mixerCardboard+lime paste: The whole mix we used for our prototypes. Its composition changed over time as described below.Quicklime: Calcium Oxide. CaO. The outcome of heating limestone. Slaked lime: Hydrated lime. Ca(OH)2. It is the paste result of putting enough water so that the quicklime combines chemically with it.Natural hydraulic lime: Ca(OH)2+reactives. It is used to make mortar which sets through hydration.

Since this last year, we have been working on what we call cardboard+lime, based on papercrete in which we swapped cement with lime. Our goal of producing insulation allows us to use a non-structural, but less harmful material. In the first experiment, we mixed lime and cardboard14 in a small brick shape which looked very promising in terms of resistance. We were really curious about what we could get from there.

The first question that appeared was which shape should we give to these prototypes: Should we continue with bricks? Should we try with panels? In our previous research, the amount of time that producing panels takes was one of the biggest handicaps, so we decided to look for a way to remove this step from the process. We opted for making shuttering molds and applying a cardboard+lime paste in situ.

First prototypes

We have made many prototypes, have learnt different new things from each one and have tried to improve in each new attempt. The second cardboard+lime paste was made from recycled cardboard that we got from Lipor, water, sand and natural hydraulic lime (NHL) and was applied in a temporary wooden formwork of 1 m2 and 8 cm of thickness.

cardboard lime insulation timeline

Recipe and setting process

We started with a basic mix made of (proportion in volume):

Cardboard15 pulp70%Sand 20%NHL 5 1610%

That first trial gave us an overview about the outcome we wanted to have and what was missing. In the following prototypes, we added borax for added resistance to fungi and mould. We also increased the proportion of hydraulic lime, reducing the sand; this made the mix easier to mix and apply. We got a better consistency in the cardboard+lime paste and we could notice it during the curing: the prototype was more compact and homogeneous.

Over time, we saw a small shrinkage up to 2% of their sizes and the terrible appearance of mould on the second and third prototypes. The cardboard+lime paste shrinks because of the amount of cardboard pulp –it tends to shrink when it loses its water– in the final mix; and the mould appears because of the slow setting process.

How did we try to solve this?

Adding slaked lime in order to kill any kind of life that wanted to appear.Adding plaster to accelerate the curing process.Reducing the percentage of cardboard pulp.

Thus, our final cardboard+lime recipe got its shape (proportion in volume):

Cardboard pulp62%Sand15.5%NHL 515.5%Slaked lime2.3%Plaster2.3%Borax2.3%

Shuttering and structure

In the beginning, the shuttering was thought of as a temporary structure –such as those we can see for making concrete– compound of vertical wooden pillars and boards. After the first prototype, we realised this was not feasible if we wanted the cardboard+lime to be a solid and permanent insulation attached to the wall.

In order to achieve a safe insulation that could last for years in place, we designed an internal structure secured to the vertical one and the wall in such a way that only the boards were removable. At the end, we decided to also add interior beams to completely ensure the cardboard+lime insulation.

Making and applying cardboard+lime

As the recipe and the structure evolved over time, so did the production process.. With the addition of new structural elements, such as the inner string and beams, the procedure became more complex.

We had to follow a step by step process in which the use of one tool or another could save us a lot of time, as well as the outcome could change completely if it was not followed properly. Furthermore, the setting process could be slashed depending on the context: are we working during Summer? Are we working in a humid zone? Do we have enough ventilation? And with it, the properties of the insulation.

How to make the cardboard+lime insulation
Disclaimer: Calculation for 1 m2 insulation. First, measure the whole wall you want to insulate and divide it in the best way it can fit. Also, if you are making the insulation in a stone/concrete wall, mark and make all the holes you will need.

Cardboard+lime paste – with the proportion referred before

For making the cardboard+lime paste we need to first prepare the cardboard pulp and the slaked lime (you can buy ready-made lime putty, but we used to make it ourselves).

Slaked lime

This is a dangerous chemical reaction, so we advise to use goggles, mask and gloves.


In a large metal container –nothing plastic though, as the heat generated by the reaction will melt it–, add one part quicklime to three parts water.Always add quicklime to water, and never water to quicklime, as it will spit, and can be very dangerous.The reaction should start and it can achieve temperatures over 100ºC.Wait until cooled down. Usually we prepared the mix at least one day in advance.

Cardboard pulp

For 1 m2 of cardboard+lime insulation, 6 cm thicker, you will need 65 l of cardboard pulp.


Tear/shred the cardboard into 4-5 cm pieces and drop them into a bucket until almost full.Pour enough water into the bucket to soak the cardboard pieces.Let the paper soak for at least 12h (and no more than 48).Attach the mixer to the drill and move it around in the cardboard to shred it to a pulp.Squeeze and reserve.

After having these two ingredients ready, we can start the mix!

In a concrete mixer, put half of the cardboard pulp, the hydraulic lime, the sand, plaster, borax and the slaked lime.Start the machine and add the rest of the cardboard pulp little by little to get a better mix.If you see the mix becoming small balls, stop and tear them apart. Mix again until having an homogenous mix.

Applying the cardboard+lime paste

For the shuttering we use 6×6 cm wooden bars and 100×33 cm plywood boards.

cardboard lime shuttering structure
Make the frame where the shuttering will be placed. Mark where the structure is going to be placed. Place a bar horizontally on the floor (a), attach it to the wall with screws. Place two bars vertically (b) with 1 m separation between them. Measure from the axis of each bar. Attach them to the wall with screws.Put four screws (c) drawing a ‘z’, two of them on the vertical bars with ~20 cm distance and the other two on the wall at the same high. Tie a string (d) ]to the first screw – the one closer to the horizontal beam on the floor–.Stretch the string to the next screw –the one at the same high that the one before–. Don’t tie the string because we will need to tight it later.


Screw the wooden board to the pillars.Start pouring the cardboard+lime paste until it covers the string. Press the paste.Tight the string.Pour more cardboard+lime paste.Stretch the string to the third screw, in diagonal.Pour more paste. Press it. – The more you press, the better.Tight the string, stretch it to the last screw on the pillar. Put a beam with nails (e) small beam]. Press.Repeat from point 2.

Setting process

Remove the boards after 3 days. There is no risk of downfall, but the cardboard+lime paste is still wet so be careful not to beat it. The setting process can last for many weeks until the insulation is completely dry, but with the proper conditions it should be around 3 weeks. During these three weeks the insulated room must be well ventilated – cross ventilation is always the best- to avoid the condensation and with it, the slowed down of the curing process.

Conclusions and further steps

After almost one year of researching and observing the behaviour of the different prototypes, it seems fair to say that cardboard+lime, with the recipe shown above, is indeed proven to be a promising insulation material.

But we ended on a process that is a bit crazy. We realized that applying cardboard+lime as we did needs specific conditions and a meticulous procedure. So, yes, for experienced building people cardboard+lime in this shape may work as an eco-friendly low-tech material. Nevertheless, our aim is to give to our society a environmentally friendly insulation material accessible for all.

How to store food outside of the fridge

Thus, now that we know that the material works, we are working to improve its shape. In our last prototypes, we decided to re-think the brick shape and made two blocks of 36x23x7.5 cm and one of 40.5x.17.5×3 cm. The outcome looks auspicious: easier process of making, less time to dry and highly resistance after the curing process.

The next steps include coming back to the panels with a hydraulic press that may allow a faster curing process and more consistent and resistant material. We keep working in this direction to maximize the potential of this insulation.

Notes and references

1 Marques Costa, R. (2019) Crise na habitação empurra mais pessoas para casas sem condições mínimas. Publico (PT) – https://www.publico.pt/2019/05/25/sociedade/noticia/ha-viva-condicoes-precarias-sao-realidades-escondidas-1873884

2 Habitat for Humanity (year) 7 things you should know about poverty and housing. https://www.habitat.org/stories/7-things-you-should-know-about-poverty-and-housing

3 Eurostat (2019), Inability to keep home adequately warm – EU-SILC survey. https://ec.europa.eu/eurostat/web/products-datasets/-/ilc_mdes01

4 Eurostat (2012), Share of population living in a dwelling not comfortably cool during summer time. https://ec.europa.eu/eurostat/web/products-datasets/-/ilc_hcmp03

5 Eurostat (2018), Total population living in a dwelling with a leaking roof, damp walls, floors or foundation, or rot in window frames or floor – EU-SILC survey. https://ec.europa.eu/eurostat/web/products-datasets/-/ilc_mdho01

6 C.-M. Popescu, D. Jones (2017) Cellulose, pulp and paper. Jones, D. Brischke, C. (Eds.) Performance of Bio-based Building Materials. [pp.75] https://doi.org/10.1016/C2015-0-04364-7

7 China Impacts Price of Recyclable Cardboard. https://www.phswastekit.co.uk/blog/posts/10-07-2019/-china-impacts-price-of-recyclable-cardboard

8 Eurostat (2016), Generation of waste by waste category, hazardousness and NACE Rev.. https://ec.europa.eu/eurostat/web/products-datasets/-/env_wasgen

9 Eurostat (2016), Treatment of waste by waste category, hazardousness and waste management operations. https://ec.europa.eu/eurostat/web/products-datasets/-/env_wastrt

10 Nubie, S. (2019) How to make papercrete: the ultimate building material for off grid living. Homestead Survival Site. https://homesteadsurvivalsite.com/how-to-make-papercrete/

11 Andrew, R (2019), Global CO2 emissions from cement production, 1928-2018, Center for International Climate Research. https://doi.org/10.5194/essd-11-1675-2019

12 IEA (2019), Tracking Industry, IEA, Paris. https://www.iea.org/reports/tracking-industry/cement

13 Recycled cardboard provided by Lipor – local trash collector company.

14 Over time, we realised that cardboard sweats the ink printed on it, so then we tried to avoid printed parts as much as possible.

15 Natural Hydraulic Lime NHL 5 NP EN 459-1.

The post Out of the box – Vol. 3 first appeared on Critical Concrete.